SGE OcrArtist – User Manual
www.sge-ing.de – Version 1.62.67 (2022-07-24 22:21)
1 Introduction
The SGE OcrArtist enables to acquire measurement data autonomously without the need for standards or interfaces using OCR (optical character recognition) from the screen.
There are many ECU-, measurement-, calibration and testbench-systems. For an efficient calibration it is necessary to be able to log all relevant parameters of all involved systems. Standards for interfaces as established e.g. by ASAM are partly not yet implemented in existing systems or the systems are not even designed for.
All systems have an interface to humans in common which allows to display measurement values on a screen. This interface is used by our measurement software OcrArtist to capture and record the displayed values by OCR (optical character recognition). OcrArtist enables the user to define and configure measurement channels comfortably. Clippings of any number of program windows can be defined which contain a measurement value. For each measurement value a channel name, channel unit, settings for character recognition and plausibility limits can be set.
In this way values of different measurement systems can be acquired in one file. Via Remote-Desktop values from different computers can be acquired using network connection.
This manual contains information concerning specifically the SGE OcrArtist only. The SGE OcrArtist is part of the SGE Circus. For help topics regarding general features please refer to the corresponding documentation accessible using the links below.
1.1 SGE Circus user manualThe SGE Circus documentation makes available general information regarding data loading procedure, input handling, preferences, history and other topics concerning all tools. |
1.2 SGE Circus videos (external) |
|
|
|

For information regarding the version dependent software changes please refer to the Release notes accessible using the corresponding menu item inside the SGE Circus.
2 Keyboard shortcuts, mouse gestures
Many functions are quickly accessible via keyboard shortcuts. For a list of available keyboard shortcuts, see the list below. In addition, the entries in the menus and context menus as well as the tooltips of the toolbar point to shortcuts.
|
Action |
|
|
Start acquisition |
|
|
Stop acquisition |
|
|
Update screenshot |
|
|
Export CAN dbc file... |
|
|
Save session... |
|
|
Clip |
|
|
Add clip... |
|
|
Edit clip... |
|
|
Move clip |
|
|
Resize clip |
|
|
Move all clips |
|
|
Delete clip |
|
|
Delete all clips... |
|
|
Options |
|
|
Set common OCR options... |
|
3 Features
The main features of the SGE OcrArtist are listed in this introduction. For details please see the following sections.
Data acquisition from any software using optical character recognition from screen
Targets
CAN-bus (incl. *.dbc generation)
Data file (*.dat, *.mf4, *.csv, *.xls)
Socket
SGE DataArtist
Acquisition rate 1ms to 60s (depending on CPU-performance)
Individual acquisition rate configuration for each channel
Automatic optimization of recognition parameters
Manual extension of recognition possible (database learning)
4 Clips / Channels
4.1 Add clips
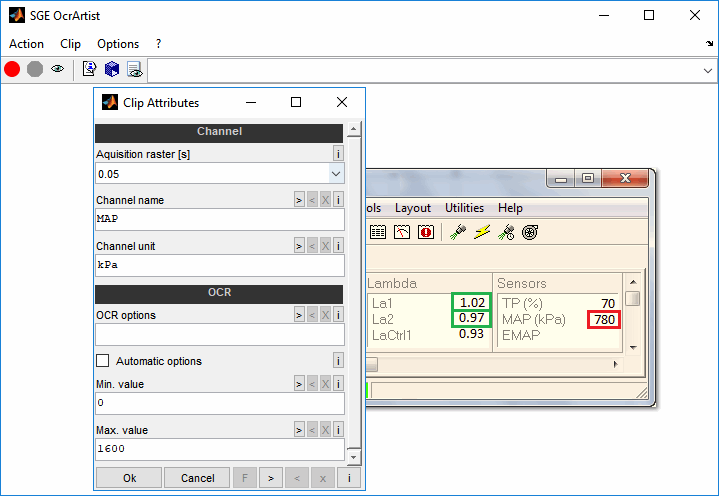
A clip corresponds to a numeric value to be captured from the screen and leads to a measurement channel.
To add a clip, you can simply use the mouse to drag a rectangular clip that completely encloses the number to be captured. You can update the background image of the OcrArtist window with a current screenshot of the monitor at any time (Ctrl + t). Note that the size of the number may change during capture if, for example, the number of decimal places changes. Therefore, make sure you have enough space in the horizontal direction. In general, the clips should not be larger than necessary, as this slows down the speed of the capture.
Once a clip has been dragged, you can configure all the options for the measurement channel.
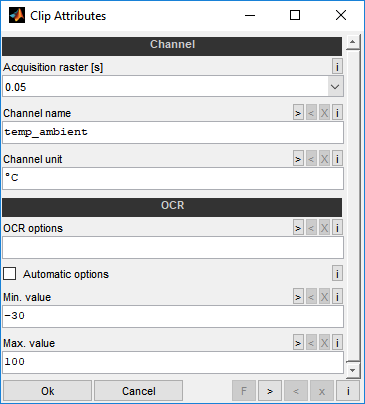
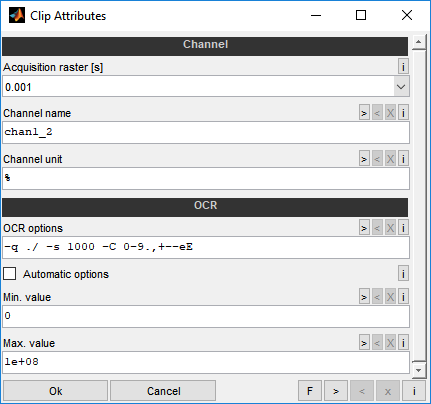
Acquisition raster [s]
Choose the acquisition raster.
Channel name
The channel name must consist only of a-zA-Z0-9_ and must not start with a number. It must be unique.
Channel unit
Enter the channel unit.
OCR options
You should try activating the "Database learning" feature before manually modifying the options.
Standard options are "-s 1000 -l 0 -d 0 -a 95 -C 0-9.,+--eE ". These are used when you leave this field empty. If you specify options here the standard options will be omitted. So make sure to include what is necessary. Do not use the -m and -p options. These are handled automatically.
Available options:
-s 1000 Minimum pixel distance to detect word bounds. Should be a a high value to detect numeric values. 0 means auto detect.
-l 0..255 Background gray level. 0 is default and means automatic detection.
-d pixel Dust pixel size. -1 means automatic detection.
-a 0..100 Demanded recognition quality. Default is 95.
-C string Character filter. Only these characters are allowed to be recognized. - can be used to define a range (a-z). To allow detection of minus use --.
Example: -q ./ -s 1000 -C 0-9.,+--eE
Before modifying the OCR options make sure to place the clip correctly. The "Show picture in case of misdetection" option assists to check this. Also try “Database learning" before modifying the OCR options.
Automatic options
If enabled the OCR options of this channel will be automatically modified in case of misdetection until the detection is working correctly. The OCR options are modified repeatedly until a working configuration is found. The current options are inserted into this field automatically and can therefore be checked at any time.
This checkbox is deactivated automatically when the detection is working correctly once after an error happened. Activating this option resets the manual OCR options from above and ignores them. In case of interrupted auto options run you can open this configuration dialog again and activate the checkbox. The next run starts from the beginning (with database learning).
Min./Max. Value
Min./Max. plausible value. Values exceeding this value will be judged as misdetection. Use this limit to prevent that not or too many detected points cause completely wrong values (1.00 → 100).
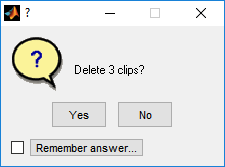
4.2 Delete clips
To delete a clip and thus the associated measurement channel, mark it with the mouse and use the shortcut key Del. To delete all clips use the corresponding menu entry or the keyboard shortcut Ctrl + Del.
4.3 Update screenshot
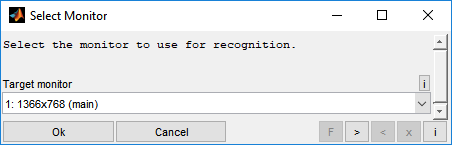
To support the creation and editing of clips you can update the background image of the OcrArtist window with a current screenshot of the monitor at any time (Ctrl + t). If several monitors exist, you can select the monitor to be acquired.
4.4 Edit / resize clips
To edit a clip with respect to its options, double-click it. You can then customize all the options that were asked for when the clip was created. In addition, the size and position can be adjusted using the mouse and keyboard:
Move single clip: Mouse left button drag (center), arrow keys
Resize single clip: Mouse left button drag (edge), Shift+arrow keys
Move all clips: Ctrl + Shift + arrow keys
5 Acquisition Targets
Various destinations are available to store the collected data. Select the desired destination from the menu.
5.1 Data file
If the target is a data file, the target file is queried at the end of the acquisition. Different file formats are available. Remember that text and spreadsheet based file formats do not support multiple acquisition raster.
MDF-files (*.dat, *.mdf, *.mf4)
Spreadsheet-files (*.xls, *.xlsx, *.ods)
Text-files (*.csv, *.txt)
Matlab-files (*.mat)
5.2 CAN bus
A CAN dbc description file is required to output the data via CAN bus. After configuration of all channels the CAN dbc file can be exported. Under certain circumstances this file will be queried at the start of the acquisition.
The ETAS ES581.3 and the Intrepid ValueCAN3 are supported as hardware interfaces. The baud rate is 500.000baud.
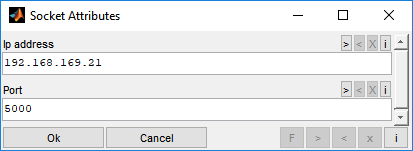
5.3 Socket
The captured data can be output via socket. The channel names and values are transferred. The format is Mathworks MATLAB specific. Contact us if you want to use socket transmission.
5.4 SGE DataArtist
The collected data can be transferred directly to the SGE DataArtist. The SGE DataArtist is opened automatically after stopping the acquisition.
6 Acquisition
6.1 Start / stop acquisition
To start and stop the recording use the corresponding menu entries, keyboard shortcuts (F12, F9) or toolbar buttons.
During capture, the areas of the clips on the screen must not be obscured by other windows, for example. The windows to be captured must also not be moved. At the start of the acquisition, the OcrArtist window is reduced to a minimum. You can resize it at any time. Correctly captured clips are displayed in green, incorrectly captured clips in red.
6.2 Status
Displaying the status at the top of the window allows you to evaluate the performance of the current acquisition and also displays the current number of errors in the recognition.

6.3 OCR performance
In order to enable the fastest possible acquisition, you should avoid using unnecessarily many raster. Since the clips of a raster are processed together, it makes sense to combine clips that can be captured quickly or slowly into a single raster.
In general, the clips should not be larger than necessary, as this slows down the speed of the capture. Note that the size of the number may change during capture if, for example, the number of decimal places changes. Therefore, make sure you have enough space in the horizontal direction.
Displaying the status at the top of the window allows you to assess the performance of the current capture.
6.4 OCR detection optimization
If the acquisition does not work correctly, you have various options for analysis.
6.4.1 Database learning
The acquisition can learn independently. To do this, you can activate the database learning option. This option works for all clips together.
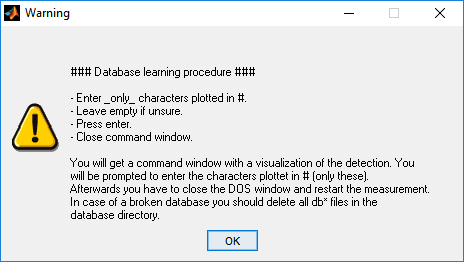
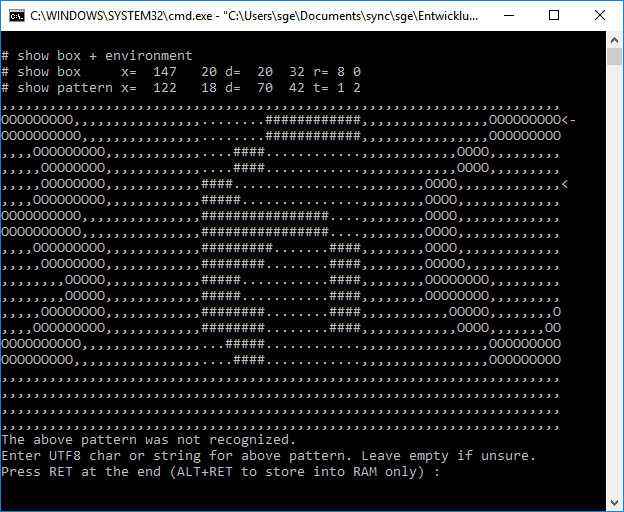
In the case of unrecognized numbers, you will then be interactively queried. For this purpose, a window is displayed which displays the unrecognized numbers. You can then enter them and save them in the database. You will get a command window with a visualization of the detection. You will be prompted to enter the characters plotted in # (only these). Afterwards you have to close the DOS window and restart the measurement. In case of a broken database you should delete all db* files in the database directory.
Please note the following information:
Enter only characters plotted in #
Leave empty if unsure.
Close command window when finished.
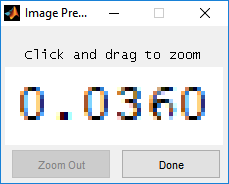
6.4.2 Show picture in case of misdetection
You also have the option of having the area captured displayed as an image in the event of misdetections. This allows you to check whether the position of the clip is correct and, for example, whether there are any disturbing effects. This option works for all clips together.
6.4.3 Automatic / manual options
If you don't get a satisfactory result with database learning, you can change special options of data entry either manually or automatically. See section “Add clips“ for details. These options work individually for each clip.
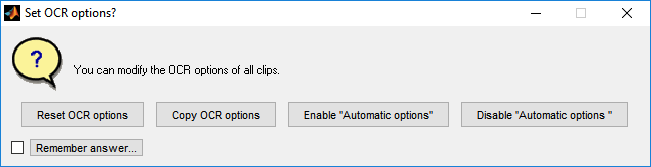
6.4.4 Set common OCR options
If you want to change options for all clips together, use the corresponding menu entry. In this way you can reset options or copy them from the selected clip to all others.
7 General information
Duplication, processing, distribution or any form of commercialization of the documents content beyond the scope of the copyright law shall require the prior written consent of the SGE Ingenieur GmbH. All trade and product names given in this document may also be legally protected even without special labeling (e.g. as a trademark).
The SGE Circus includes Third Party Software. For details please refer to the → SGE Circus documentation.
MATLAB, Simulink and Stateflow are registered trademarks of The MathWorks Inc., Natick, MA, USA.
SGE Ingenieur GmbH – www.sge-ing.de
Copyright 2011-